Picture Rail: Purpose, Height, Thickness, Installation Guide
If you’ve ever tried to rearrange a gallery wall only to find yourself patching half a dozen nail holes, a picture rail is the solution you didn’t know existed. This slim strip of moulding near the ceiling has been quietly solving the hanging problem for over a century, and it’s enjoying a noticeable comeback in both period homes and modern apartments.
Standard thickness: 16 mm (common for pine rails) ·
Typical height below ceiling: 12–18 inches ·
Average cost per foot: €5–€10 ·
Number of profile styles: Over 20 commercial options ·
Primary material: Primed pine or MDF
Quick snapshot
- Picture rails are mouldings attached to walls to hang pictures using hooks (Practical DIY)
- Standard thickness is around 16 mm for common pine rails (Skirting World)
- Originated in the 19th century as a practical solution for plaster walls (The Craftsman Blog)
- Whether picture rails are considered fashionable in all modern interior design styles — opinions vary
- Exact original date of first picture rail use is not precisely documented
- Victorian era (1837–1901): picture rails standard in middle- and upper-class homes (The Craftsman Blog)
- Mid-20th century: fell out of favour as drywall and adhesive hooks became common (The Craftsman Blog)
- Resurgence: gained popularity again in the 2010s as part of heritage interior trends (Period Property UK)
- Modern designers are integrating picture rails into minimalist and contemporary interiors (Our Aesthetic Abode)
- DIY installation guides and clip-on rail systems making it more accessible to non-professionals (Our Aesthetic Abode)
- Growing interest from renters seeking damage-free hanging solutions (Our Aesthetic Abode)
Here are the key specifications for picture rails.
| Material | Primed pine, MDF, hardwood, or plaster |
| Typical thickness | 16–20 mm |
| Primary purpose | Hanging art without penetrating walls |
| Common height below ceiling | 12–18 inches (30–45 cm) |
| Historical period | Victorian era (1837–1901) |
What is the point of a picture rail?
Historical purpose
In the 19th century, plaster walls were the standard. Hanging a heavy oil painting meant driving a nail through the plaster, which often cracked or crumbled. The picture rail — a wooden moulding fixed to the wall near the ceiling — solved that problem: it transferred the weight directly to the wall structure via the rail, leaving the plaster untouched. As The Craftsman Blog (heritage building resource) notes, the rail made it possible to rearrange artwork without leaving a trail of holes.
Modern benefits
- Protects walls from nail damage — no patching required when you move art
- Allows easy rearrangement of art without patching holes (Practical DIY)
- Adds decorative moulding that enhances room character
How it works
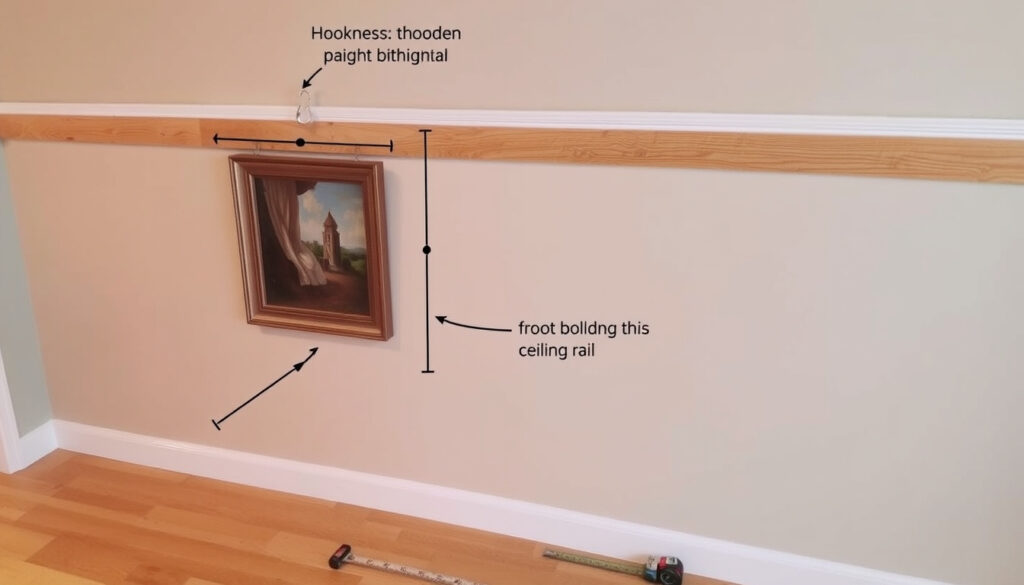
You attach the rail to the wall near the ceiling. Then you use special picture rail hooks that hook over the top edge of the rail and hold a wire or cord that suspends the artwork. The cord length determines the hanging height. As Picture World (specialist picture hanging retailer) explains, leaving extra cord length before securing the ends gives you room to fine-tune the final height.
Upsides
- Protects walls from nail damage
- Allows easy rearrangement of art
- Adds decorative architectural detail
Downsides
- Visible moulding may not suit every style
- Requires one afternoon to install
- Costs €50–€80 for materials
A homeowner who changes wall art even once a year will save more time patching and repainting than the one afternoon the rail takes to install. The trade-off is visible moulding — you have to like the look, or paint it to blend in.
The implication: picture rails are a time-saving investment for anyone who regularly rotates wall art.
What is the difference between a dado rail and a picture rail?
They are the two most common horizontal mouldings in a period home — and people mix them up constantly. Four key dimensions separate them: purpose, height, profile, and the problem each solves.
| Feature | Picture rail | Dado rail |
|---|---|---|
| Purpose | Hanging art using hooks (Practical DIY) | Protecting walls from chair backs and furniture scuffs |
| Typical height | 12–18 inches below the ceiling | 90–110 cm from the floor |
| Profile depth | Shallow — designed to accept hooks | Often deeper, with a decorative lip |
| Visual effect | Makes room feel taller | Divides wall into lower and upper panels |
Five inches, six inches — the gap matters because the two mouldings operate in completely different visual zones. Skirting World (UK moulding supplier) describes the picture rail as “a rail that runs close to the top of the room, around the height of the door frame, or just below the ceiling.” Dado rail, by contrast, sits at hip height — waist-level protection from chairs and elbows.
In a single room, you can have both: dado rail at standard height and picture rail near the ceiling. The risk is visual clutter if the profiles clash. Choosing one often means deciding whether you need protection from scuffs (dado) or a flexible hanging system (picture rail).
The pattern: the choice between dado and picture rail hinges on whether you need scuff protection or a flexible hanging system.
How thick should a picture rail be?
Standard thickness range
Common thickness is 16–20 mm (approximately 5/8 to 3/4 inch), according to Skirting World. Thinner rails (under 16 mm) may flex under the weight of multiple heavy frames, while thicker rails (20 mm+) support heavier frames and convey more presence in a tall room.
Material considerations
- Pine: Most common; 16 mm pine rails are standard; cost-effective and paintable
- MDF: Can be slightly thinner (12–16 mm) while remaining durable; smooth surface with no knots; prone to swelling if moisture reaches it
- Hardwood (oak, walnut): Often 18–20 mm; more expensive but stiffer; can be stained instead of painted
Thickness vs load capacity
A 16 mm pine rail secured into studs with construction adhesive can hold 10–15 kg across several hooks, based on Systematic Art’s (gallery rail installer) installation guide. The critical point: thickness matters less than stud spacing and the quality of the rail-to-wall bond. A 12 mm MDF rail glued and screwed into solid wall anchors can outperform a 20 mm rail held only by nails into plaster.
If you match the picture rail thickness exactly to your door architraves and skirting boards, the room feels designed, not patched. A 6 mm mismatch between the rail and door trim stands out to anyone who glances at the wall.
The catch: thickness consistency with existing trim is more important than absolute thickness for visual harmony.
Is a picture rail old fashioned?
The short answer: yes, in the Victorian sense — and that is precisely why many designers are bringing it back.
Victorian origins
Picture rails were standard in Victorian and Edwardian homes (1837–1910). They made economic sense: heavy framed paintings needed a structural base, and plaster alone could not support them. As The Craftsman Blog (preservation-focused resource) notes, the rail was not a decorative afterthought — it was a practical answer to a construction limitation.
Modern revival in interior design
Fell out of favour mid-20th century as drywall became the norm and lighter frames made adhesive hooks viable, but picture rails have seen a visible resurgence in the past decade, driven by heritage interior trends on social media and a growing preference for damage-free hanging in rental properties. A guide by Period Property UK (YouTube, heritage renovations) shows Victorian-style rails being installed in new-build apartments for aesthetic cohesion.
Styling a picture rail in contemporary homes
Modern designers use them as a feature in both period and minimalist interiors, and the key is to paint the rail the same colour as the wall to make it recede, or contrast it for a deliberate band. Our Aesthetic Abode (home decor blog) demonstrates a contemporary living room where a white picture rail sits against a deep green wall, echoing the door architrave height.
How to make your own picture rail
If you have basic woodworking tools and a weekend afternoon, this is a straightforward DIY project. The steps below are adapted from Systematic Art’s installation guide and Practical DIY.
Materials needed
- Primed pine or MDF board, typically 1×3 or 1×2 inch (or pre-profiled picture rail moulding)
- Construction adhesive (grip-bond type)
- Finish nails (18-gauge, 40 mm)
- Stud finder, spirit level, measuring tape
- Miter saw (or hand saw with miter box)
- Sandpaper (120 and 220 grit)
- Wood filler, primer, paint to match trim
Cutting the rail
Measure each wall section individually — walls are rarely perfectly straight. Cut miters at 45 degrees for inside and outside corners. Systematic Art recommends cutting all pieces before applying adhesive to avoid rushing glue joints.
Attaching to the wall
- Mark the rail height: 12–18 inches below ceiling for a standard 8–9 foot ceiling, or align with the top of door architraves (Our Aesthetic Abode)
- Use a spirit level to draw a horizontal reference line around the room
- Apply construction adhesive to the back of the rail
- Press the rail to the wall and secure with finish nails into studs (spacing: 30–40 cm, per clip-rail installation guide on YouTube)
- Wipe off any adhesive squeeze-out immediately
Finishing and painting
Sand any rough edges with 120-grit then 220-grit paper. Fill nail holes with wood filler, let dry, and sand flush. Apply primer, then two coats of paint. Skirting World notes that pre-primed rails take paint well and save a step.
A homeowner with standard tools and zero prior moulding experience can install a picture rail in 4–6 hours for a 4×5 metre room. The cost: roughly €50–€80 for materials. The same rail from a professional installer would run €300–€500.
Summary
Picture rails are not a relic — they are a practical tool that has outlived the plaster wall problem that created them. For anyone who hangs and rehangs art regularly, the rail eliminates the most tedious part of the process: patching holes. For the renter, it offers a damage-free alternative to drilling. And for the period homeowner, it restores an original detail that makes the room feel intentional. For anyone in a rental or a modern home who wants flexible, damage-free hanging, the choice is clear: install the rail, or keep patching holes.
youtube.com, arthangingsystems.com.au, coloradoartservices.com
Frequently asked questions
How do you clean a picture rail?
Dust with a soft microfiber cloth or a vacuum brush attachment once a week. For painted rails, a damp cloth with mild soap works. Avoid abrasive cleaners that can dull the paint finish.
Can picture rails be painted?
Yes, and they often should be. Use a high-quality primer first, then two coats of water-based paint. The finish should match your existing trim for a cohesive look.
What is the best hook for a picture rail?
Traditional mechanical hooks that hook over the rail’s lip are the most secure. Adhesive hooks exist but Picture World recommends mechanical hooks for any frame over 2 kg.
How do you repair a damaged picture rail?
Small dents and scratches can be filled with wood filler, sanded, and repainted. For larger damage, cut out the damaged section with a handsaw, splice in a new piece, and paint over the joint.
Do picture rails work with drywall?
Yes. Use toggle bolts or drywall anchors where the rail does not align with studs. The rail itself adds structural rigidity to the drywall. A clip-rail installation guide covers anchor spacing for drywall specifically.
What is the difference between a picture rail and a crown moulding?
Crown moulding sits at the ceiling-wall junction (covering the gap). Picture rail sits below the crown moulding (or alone) and is specifically designed to hold hooks for hanging art. Crown has no hanging function.
How much weight can a picture rail hold?
It depends on how well the rail is secured. A rail screwed into studs every 30–40 cm with construction adhesive can support 10–15 kg spread across multiple hooks. Concentrating all weight on one hook is not recommended.
Understanding these FAQs helps homeowners make informed decisions about installation and maintenance.
More related posts
 Ross King: Presenter, Marriages, Net Worth, Strictly Come Dancing
 181 cm in Feet: Exact Conversion to Feet & Inches
 Kim Porter: Cause of Death, Children, and Life with Diddy
 Nike Air VaporMax Plus Review: Is It Worth the Money?
 White Jeans: Year-Round Styling Tips for Any Age (2026)
 PSG vs Aston Villa – Preview, Team News, Predictions
 Who Is Victoria Starmer? Biography, Career & Facts
 Australian Cricketer: Legends, Records, and Current Stars Explained