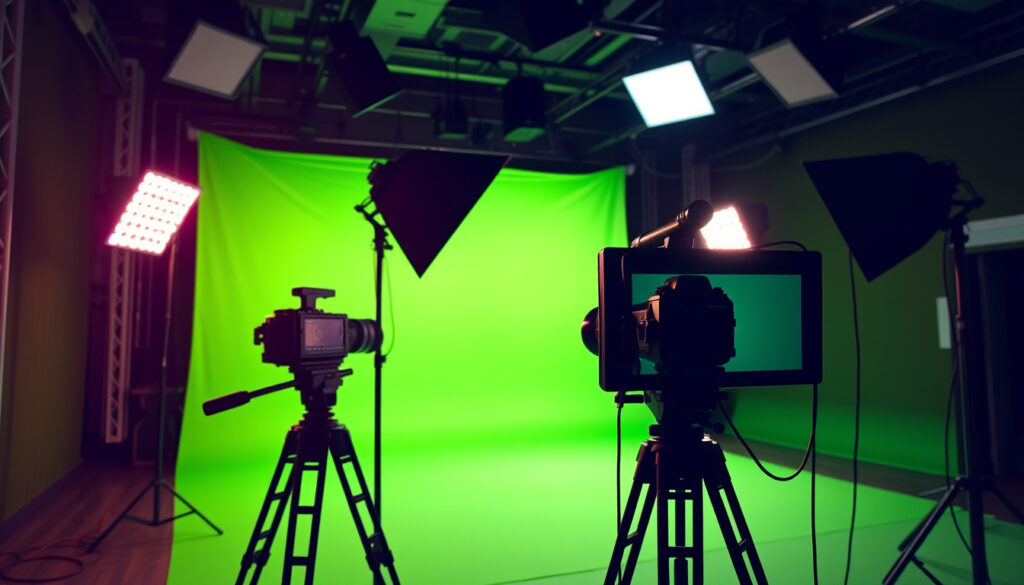
What Is a Green Screen? How It Works and How to Use It
Anyone who’s watched a weather forecast has seen a green screen in action, even if they didn’t notice. That simple backdrop has been hiding in plain sight for decades, powering everything from Hollywood space battles to Zoom backgrounds, and this guide covers the basics of chroma key, how to set up your own green screen at home, and which software can help you remove that green background cleanly.
Chroma key invented: 1930s (Warner Bros.) ·
Used in weather broadcasts: Nearly 100% of TV stations ·
Price range for home kits: $20 – $150 ·
Popular software: Adobe Premiere Pro, OBS Studio, Final Cut Pro
Quick snapshot
- Green screen is a chroma key technique that replaces a solid color background with another image or video (Pinnacle Systems (video editing software company)).
- Green is preferred over blue for digital keying due to lower noise in the green channel of digital sensors (StudioBinder (film production resource)).
- A common beginner setup recommendation is to place the subject several feet in front of the green screen to reduce spill and shadows (Pinnacle Systems). (Pinnacle Systems (video editing software company))
- Exact origins of the term “green screen” vs “blue screen” are debated.
- Whether AI background removal will fully replace green screens in the future is uncertain.
- The optimal distance between subject and green screen varies by source — some recommend 3–6 feet, others 8–15 feet.
- Whether budget LED panels can match traditional softbox lighting for professional green screen work remains contested among creators.
- Chroma key technique pioneered in the 1930s at Warner Bros. (StudioBinder).
- AI-powered background removal tools are becoming more accessible, potentially reducing the need for physical green screens.
Four facts that define the green screen landscape:
| Fact | Value |
|---|---|
| First use in film | The Thief of Bagdad (1940) |
| Common green screen color hex | #00FF00 |
| Popular free software | OBS Studio, DaVinci Resolve |
| Average cost of professional kit | $200 – $500 |
The implication: The core technology has been around for over 80 years, but the price for entry has dropped enough that anyone with a smartphone can try it.
What does a green screen do?
A green screen, technically called chroma key compositing, is a visual effects technique that replaces a uniform color (usually green) with another image or video. The method works by isolating the color range of the background and making it transparent, then layering the subject over a new background. It is used in film, television, weather forecasts, and online video production (Pinnacle Systems).
How chroma key compositing works
- The camera captures the subject in front of a evenly lit green backdrop.
- Editing software analyzes the green channel and removes pixels within a defined color range.
- The remaining subject is then placed over a new background image or video.
Green is the default color because it offers the highest contrast with human skin tones and produces less noise in the green channel of digital sensors (StudioBinder).
Chroma key is a precise color-based mask, not a generic “remove background” button. The cleaner the green, the cleaner the key.
The pattern: A green screen is just a tool; the real magic happens in the software that interprets the color data.
How to use green screen to remove background?
Removing a green background requires both proper setup and the right software. The basic workflow: place your subject in front of a green screen, light both evenly, then use a chroma key effect in your video editor to make the green transparent.
What software do you need?
- Professional: Adobe Premiere Pro (Adobe Help Center (creative software company))
- Free: OBS Studio, DaVinci Resolve, Kdenlive (Kdenlive Manual (open-source video editor))
- Online: Canva, WeVideo (Canva (design platform), WeVideo (cloud video editor))
Do I need a green screen to remove the background?
Not necessarily. AI-based tools like remove.bg and Zoom’s virtual background can separate a subject without a green screen, but results vary. The AI models struggle with fine details like hair and can produce jittery edges. A physical green screen still gives the most reliable results for professional video (Wired (tech magazine)).
How do I green screen an image?
For still images, software like Adobe Photoshop and GIMP offer a “Color Range” or “Chroma Key” tool. In Photoshop, use Select → Color Range, click on the green background, and delete it. Free online tools like Canva also have a “Background Remover” that works well for images with solid green backdrops (Canva).
How do I edit something on a green screen?
In video editing, the basic steps are: import both the green screen clip and the background clip onto separate tracks, enable the chroma key effect, use the eyedropper to sample the green color, and adjust the tolerance until the green disappears. For example, in Kdenlive, you select the clip, apply the Chroma Key effect, and use the pipette tool to sample the background color (Kdenlive Manual).
Even with good software, lighting mistakes are the most common reason for a poor key. Uneven green creates shadows that the chroma key cannot remove cleanly.
The trade-off: AI removal tools are convenient but lack precision; a green screen setup requires more work but delivers a cleaner, more reliable composite.
How expensive are green screens?
Green screen kits range from $20 to $500, depending on size, material, and included accessories. The price is driven by factors like portability, wrinkle resistance, and whether the kit includes lights and stands.
Types of green screen kits
- Fabric backdrop with stand: $20 – $60
- Collapsible pop-up screen: $40 – $100
- Professional studio kit (with lights and stands): $150 – $500
Factors affecting price
- Material: Muslin is cheaper but wrinkles; polyester is more expensive but wrinkle-resistant.
- Size: Larger screens cost more. A 5×7 ft screen is enough for a single person; 10×12 ft is needed for a full body shot.
- Included accessories: Kits with lights, stands, and carrying bags are more expensive but save separate purchases.
Portable pop-up screens, which are common for home use, cost between $40 and $100 (Wired).
The pattern: The biggest cost isn’t the screen itself — it’s the lighting. A cheap screen with good lights can outperform an expensive screen with poor lighting.
Can I do a green screen at home?
Yes, you can set up a green screen in a small room with a basic lighting kit. The minimum viable setup includes a collapsible green backdrop, two softbox lights for the screen, and one key light for the subject (VibrantSnap (photography blog)).
What equipment do I need for a home green screen?
- Green screen backdrop (fabric or pop-up) – $20–$100
- Two lights for the backdrop (softbox or LED panels) – $50–$150
- One key light for the subject – $30–$80
- Camera (webcam, smartphone, or DSLR) – $0–$500
- Video editing software (free or paid) – $0–$20/month
Space and lighting requirements
- Place the subject at least 3–6 feet in front of the screen to avoid green spill (Pinnacle Systems).
- Lights should be positioned at a 45-degree angle on each side of the screen, 3–4 feet from the backdrop (CorridorKey (green screen software blog)).
- Use a separate light for the subject to avoid shadows on the screen.
- Iron or stretch the fabric to remove wrinkles, which create shadows that are hard to key out (Cityjournal.uk (lifestyle blog)).
Cityjournal.uk suggests placing the subject 8 to 15 feet from the screen to minimize spill and shadows, though this requires a larger space (Cityjournal.uk).
The implication: A home setup is perfectly feasible, but lighting is the make-or-break factor. It’s better to invest in lights than in a more expensive screen.
What are the disadvantages of using a green screen?
Green screens are powerful but not without challenges. The most common issues stem from poor lighting, material quality, and software complexity.
Is it hard to edit with a green screen?
For beginners, the learning curve can be steep. Software like Adobe Premiere Pro offers many controls (tolerance, edge refinement, spill suppression) that require practice to master (Adobe Help Center). Free tools like OBS Studio are easier but offer fewer fine-tuning options. Additionally, green spill – the reflection of the green color onto the subject – can be time-consuming to remove.
What are common greenscreen mistakes to avoid?
- Using the wrong shade of green – the ideal is a bright, evenly lit #00FF00.
- Poor lighting – shadows and uneven brightness cause holes in the key.
- Wrinkles in the fabric – they create shadows and uneven color.
- Low resolution footage – fine details like hair require high resolution for a clean key.
- Motion blur – fast-moving subjects can create ghosting artifacts.
To avoid these, ensure the screen is wrinkle-free, light it separately from the subject, and use a camera that shoots at least 1080p (Instructables (DIY community)).
A poor green screen key can ruin an otherwise well-produced video. The extra time spent on lighting and setup pays off in post-production time saved.
The catch: Even experienced editors occasionally fight with green spill. The best defense is a good lighting setup, not a better software.
Comparison: Green screen vs blue screen vs AI removal
Three approaches to background removal, one editor’s choice:
| Method | Best for | Cost | Ease of use | Quality |
|---|---|---|---|---|
| Green screen | Indoor video, subject with bright clothing | Low ($20–$500) | Medium – requires lighting setup | Excellent with proper lighting |
| Blue screen | Outdoor scenes, subjects with green clothing | Similar to green | Same as green | Good, but green channel has less noise |
| AI removal (no screen) | Quick, casual use (Zoom, social media) | Free to $10/month | Very easy | Variable – struggles with hair and edges |
The pattern: Green screen offers the best reliability for professional work. AI removal is convenient for quick fixes but not yet a replacement for production-quality keying.
Pros and cons of using a green screen
Upsides
- Produces the cleanest, most consistent key.
- Works with any editing software.
- Low cost for entry-level kits.
- Versatile for video, photography, and live streaming.
Downsides
- Requires dedicated space and lighting equipment.
- Learning curve for proper setup and editing.
- Green spill can contaminate the subject.
- Not portable without a pop-up screen.
The pattern: The simplicity of setup is offset by the complexity of execution, making preparation the deciding factor.
Step-by-step: How to set up a green screen and key out the background
Follow these steps for a clean result:
- Choose your screen: A collapsible pop-up screen ($40–$100) is best for home use. Ensure it’s wrinkle-free (Instructables).
- Set up lights: Place two lights on each side of the screen at a 45° angle, 3–4 feet away (CorridorKey). Use a third light for the subject.
- Position the subject: Place the subject 3–6 feet in front of the screen to avoid spill (Pinnacle Systems).
- Check the lighting: The green should be evenly lit with no shadows. Use a light meter or check the histogram.
- Record or capture: Shoot in a well-lit room. Avoid motion blur by using a faster shutter speed.
- Import into software: Open your video editor (e.g., OBS, Premiere Pro, Kdenlive). Create a new project and add the green screen clip on a track above the background.
- Apply chroma key: Select the chroma key effect, use the eyedropper to pick the green color, then adjust the tolerance until the green disappears but the subject remains sharp (Kdenlive Manual).
- Refine the edge: Use edge smoothing or spill suppression to remove any green halo around the subject.
- Preview and export: Play the scene to check for artifacts, then export your final video.
The implication: The setup takes 15–30 minutes, but a well-prepared shoot saves hours of post-production frustration.
Timeline: The evolution of green screen technology
Chroma key has come a long way from analog film compositing to digital software and AI:
- 1930s: Chroma key technique pioneered using blue screen at Warner Bros. (StudioBinder).
- 1940: First feature film using blue screen: The Thief of Bagdad.
- 1970s: Green screen begins to replace blue due to better contrast with skin tones and digital sensors.
- 1990s: Digital compositing becomes common in film and TV.
- 2010s–present: Affordable green screen kits and software make the technique accessible to home users. AI-powered background removal emerges as an alternative.
The pattern: Each decade has lowered the barrier to entry, from Hollywood studios to bedroom creators.
Clarity: Confirmed facts vs what’s unclear
Confirmed facts
- Green screen is a chroma key technique.
- It was invented in the 1930s.
- Green is preferred over blue for digital keying due to lower noise in the green channel.
- Proper lighting is the most critical factor for a clean key.
What’s unclear
- Exact origins of the term “green screen” vs “blue screen” are debated.
- Whether AI background removal will fully replace green screens in the future is uncertain.
- The optimal distance between subject and screen varies between 3–6 feet and 8–15 feet depending on the source.
- Whether budget LED panels can match softbox lighting for professional results is still debated among creators.
The pattern: What is settled — lighting discipline and subject separation — matters more than what remains debated.
Expert perspectives on green screen usage
“Chroma key compositing, or green screen, is a technique that allows you to replace a solid color background with another image or video.”
“To get a clean key, the green screen must be evenly lit and the subject must be separated from the background by at least a few feet.”
— Adobe Help Center (creative software company)
The implication: Both sources agree on the fundamentals – even lighting and subject separation are non-negotiable.
Summary
Green screen technology has evolved from a Hollywood secret to a home creator’s tool. The key to success lies not in the screen itself but in the lighting and software workflow. For home video creators, the choice is clear: invest in a proper green screen setup and lighting, or accept the limitations of AI removal tools. The time spent on a good setup pays off in professional-looking results that keep viewers focused on your content, not on your background.
Frequently asked questions
What is the difference between green screen and blue screen?
Green screen is more common for digital video because the green channel contains less noise, giving a cleaner key. Blue screen is still used when the subject wears green clothing or for outdoor scenes where green might match the environment (StudioBinder).
Can I use a white wall instead of a green screen?
No, a white wall does not provide a consistent color for chroma key. The keying software needs a uniform color to isolate. A white wall will have varying shades due to lighting and shadows, making it impossible to remove cleanly without affecting the subject.
What lighting is best for green screen?
Soft, even lighting is best. Use softbox lights or LED panels placed at 45° angles on each side of the screen. The subject should be lit separately with a key light to avoid shadows on the green backdrop (Canva).
How do I avoid green spill on my subject?
Increase the distance between the subject and the screen (at least 3 feet), use a dedicated light for the subject, and in editing apply spill suppression or desaturate the green channel on the edges (Pinnacle Systems).
Is a green screen necessary for Zoom virtual backgrounds?
No, Zoom’s virtual background feature works without a green screen using AI. However, using a green screen improves the accuracy and reduces artifacts around the subject’s hair and edges (Wired).
Which color green should I use for a green screen?
The standard green screen color is hex #00FF00, a bright, saturated green that is easiest for software to isolate because it is not commonly found in skin tones or clothing. Avoid dark or muted greens (StudioBinder).
How do I key out green screen in Photoshop?
In Photoshop, go to Select → Color Range, click on the green background, adjust the fuzziness to capture all shades, then delete the selection. You can also use the “Remove Background” button in the Properties panel for a quick result (Canva).
Related reading
More related posts
 RFK Jr.: Age, Brain Worm, Family, and HHS Secretary Role
 Castor Oil Benefits, Uses & Safety in Ireland
 Bar Bar Stool: IKEA Options, Backs & Clearance Deals
 Sleeping Beauty: Story, Grimm Version, and Disney Differences
 Dr Dennis Gross LED Mask Review: Is It Worth the Price?
 Best Pillows for Neck Pain Relief: Top Expert Picks 2026
 Gary Busey: Accident, Diagnosis, Net Worth, and Career Change
 Henry VIII: Six Wives, Health Decline, and Tudor Legacy